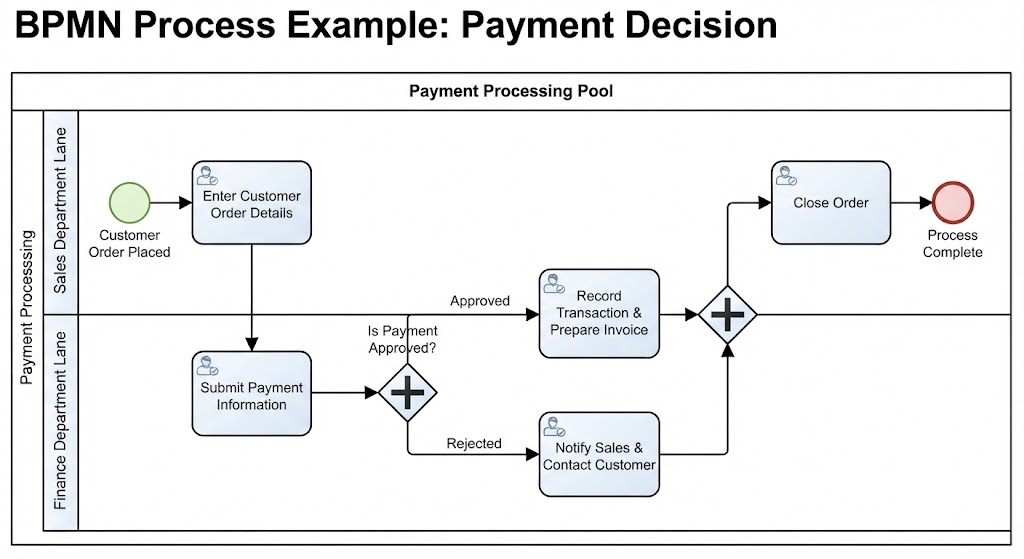
In the world of business process management, clarity is king. When complex workflows involve multiple departments and conditional logic, a visual map is essential. This tutorial breaks down the BPMN (Business Process Model and Notation) diagram titled “Payment Processing Pool,” guiding you through the architecture, the decision-making gateways, and the flow of operations within a typical order-to-cash cycle.
1. The Architecture: Pools and Lanes
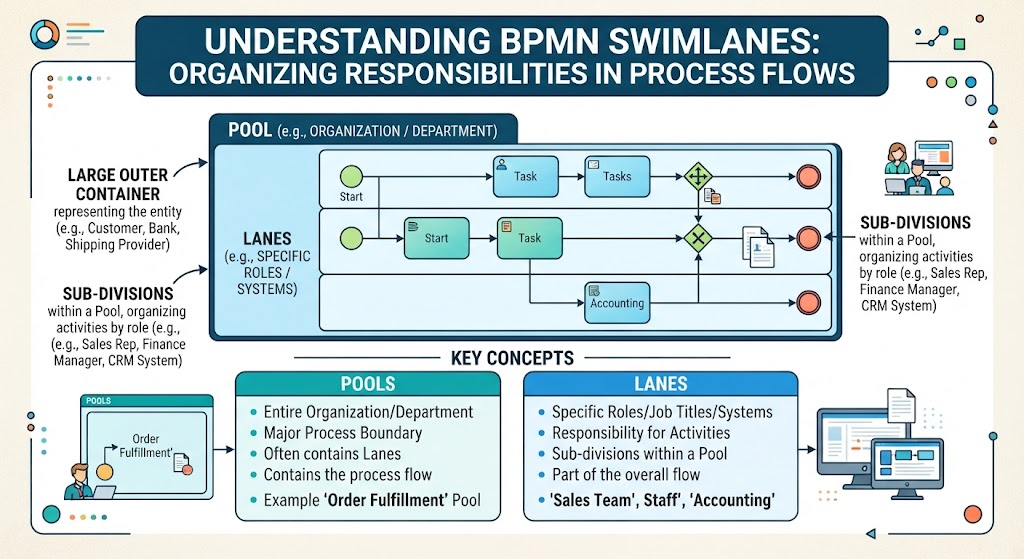
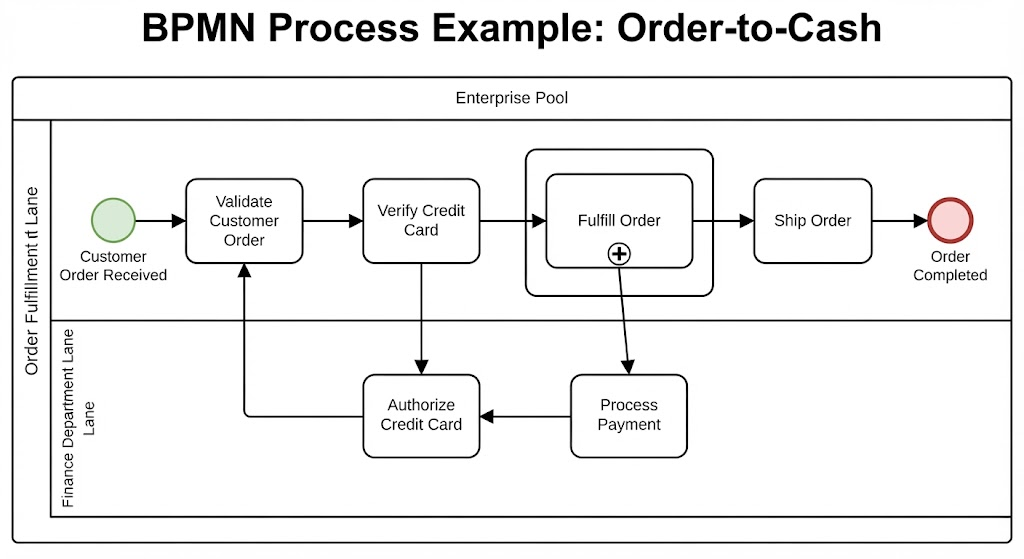
Before diving into the individual steps, we must understand the container of the process. The entire diagram is enclosed in a large rectangle known as a Pool. In this specific example, the Pool is labeled Payment Processing Pool, representing the entire scope of the business process being modeled.
Within this pool, the process is divided into vertical strips called Lanes. Lanes are crucial for defining responsibility. In our diagram, we see two distinct lanes:
- Sales Department Lane: This lane handles the initiation of the order. The process begins here with the entry of customer details.
- Finance Department Lane: This lane handles the financial validation. It is responsible for submitting payment information and processing the actual transaction.
2. The Flow of Operations
The diagram utilizes standard BPMN shapes to represent the lifecycle of a customer order. Let’s trace the solid arrows (Sequence Flows) from left to right.
Starting the Process
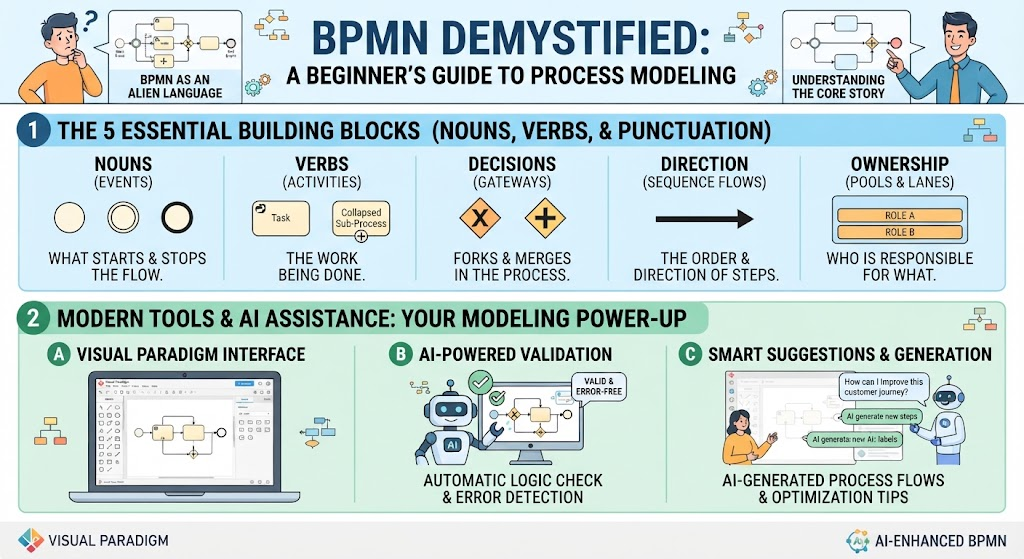
The process is triggered by the green circle on the far left, labeled Customer Order Placed. This is a Start Event. It signifies that an external trigger has occurred, and the system is now ready to begin work.
Tasks and Activities
Following the arrow from the start event, we encounter the first task: Enter Customer Order Details. This is a standard Activity (represented by a rounded rectangle). Once this is complete, the flow moves downwards into the Finance Department Lane.
The next activity is Submit Payment Information. This represents the handoff from Sales to Finance, where the necessary financial data is entered into the system.
3. The Critical Decision Point: Exclusive Gateways
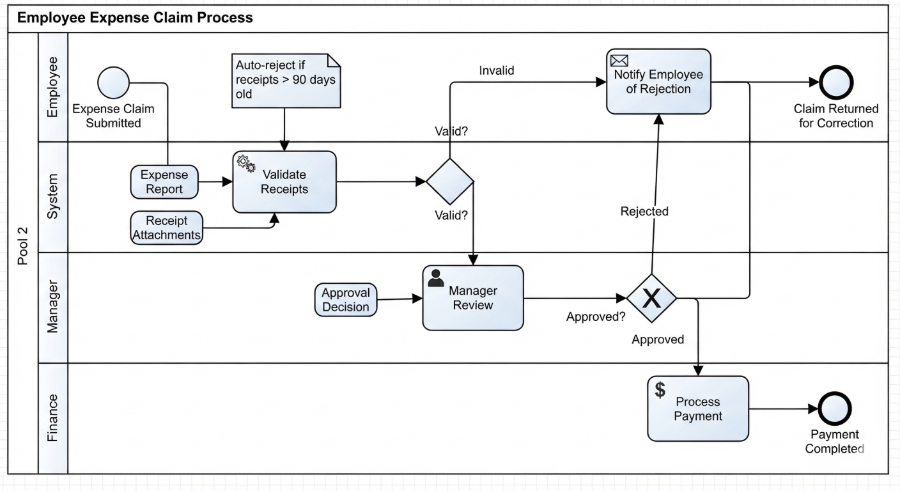
Real-world processes rarely follow a straight line. This is where the Gateways come into play. You will see a diamond shape with an “X” inside it. This is an Exclusive Gateway.
Understanding the “Fork in the Road”
The Exclusive Gateway acts as a decision point. The label above it reads Is Payment Approved?. At this specific node, the process diverges based on a condition. The “Golden Rule” of Exclusive Gateways is that only one path can be taken at a time.
In our diagram, two paths emerge:
- Path A (Approved): If the payment is successful, the flow moves upward to the next activity.
- Path B (Rejected): If the payment fails, the flow moves downward to a notification task.
Handling Outcomes
If the path is Rejected, the process moves to the task Notify Sales & Contact Customer. This ensures that the relevant department knows the transaction failed so they can reach out to the client. This path is critical for exception handling.
4. Reconciling Paths: The Join Gateway
After the decision is made, the process needs to converge back into a single line of execution. We see a diamond shape with a Plus sign (+) inside. This is a Parallel Gateway (or Inclusive Gateway depending on strict BPMN versioning, but here functioning as a Join).
Notice how both the Approved path (from Record Transaction & Prepare Invoice) and the Rejected path (from Notify Sales & Contact Customer) point into this diamond. This indicates that regardless of the outcome, the process must proceed to the next step.
5. Completion
Following the merge, the flow proceeds to Close Order and finally hits the red circle labeled Process Complete. This is an End Event, signifying the successful termination of the business process.
Summary of Key Takeaways
By analyzing this diagram, we learn that effective process modeling requires:
- Clear Responsibilities: Using Lanes to separate Sales and Finance duties.
- Conditional Logic: Using Exclusive Gateways (Diamonds) to handle “Yes/No” scenarios.
- Path Convergence: Using Join Gateways to ensure all outcomes lead to a unified conclusion.
- Visual Hierarchy: Reading from left to right and top to bottom using solid Sequence Flows.
Whether you are using tools like Visual Paradigm or drawing these by hand, understanding these symbols allows you to translate complex business rules into clear, actionable visual workflows.