In the world of business process modeling, clarity is king. Business Process Model and Notation (BPMN) has established itself as the industry-standard graphical language for representing workflows. At the very foundation of every BPMN diagram lies the Start Event—the single point where a process is born. Without a clearly defined beginning, a process model cannot be executed, analyzed, or optimized. This tutorial delves deep into the anatomy of BPMN start events, exploring their types, triggers, and practical implementations.
The Role of the Start Event
A start event is not merely a visual element; it is the trigger mechanism for an entire workflow. It represents the specific condition or action that causes a business process to move from a dormant state to an active one. In BPMN, the start event is depicted as a circle. While the shape is simple, the logic behind it is complex and dictates the reliability of your model.
Why Precision Matters
Whether you are mapping an order fulfillment workflow or designing an approval pipeline, the start event answers the critical question: “How does this process begin?” Understanding the distinction between different start events is fundamental for creating accurate, executable models. A poorly defined start can lead to ambiguity in process ownership and execution timing.
Exploring Types and Triggers
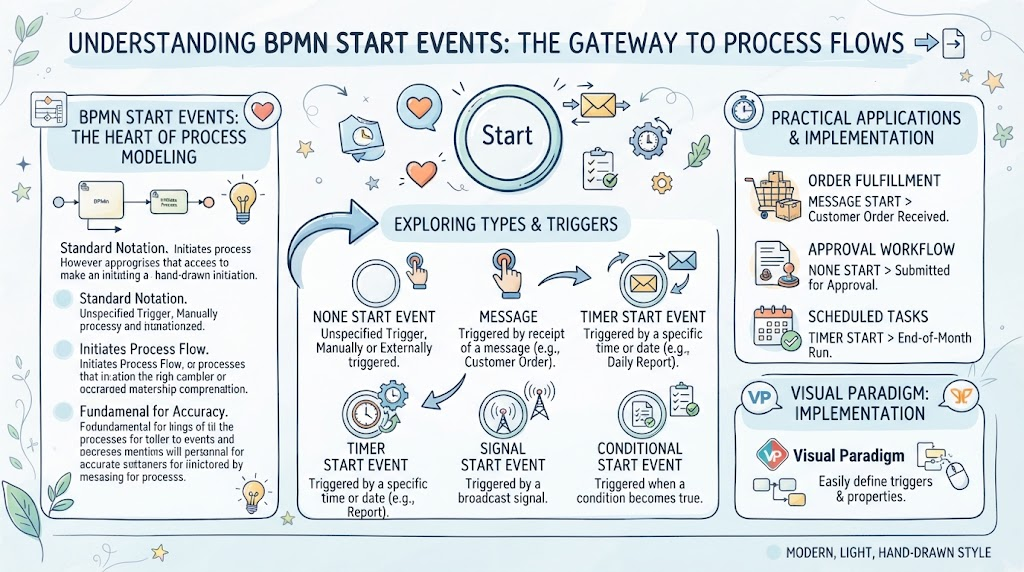
BPMN provides a rich vocabulary of start events, each designed to handle specific types of triggers. The image below illustrates the core types you need to master. Let’s break down the most common variants.
1. None Start Event (The Default)
Visually represented by a single thin circle, the None Start Event is the most generic type. It implies that the process is initiated manually or by an unspecified trigger.
- Trigger: Unspecified. It does not specify how the process starts, only that it starts.
- Usage: Ideal for processes that require manual initiation, such as a user clicking a “Start” button in a form or a hand-drawn workflow initiation.
2. Message Start Event
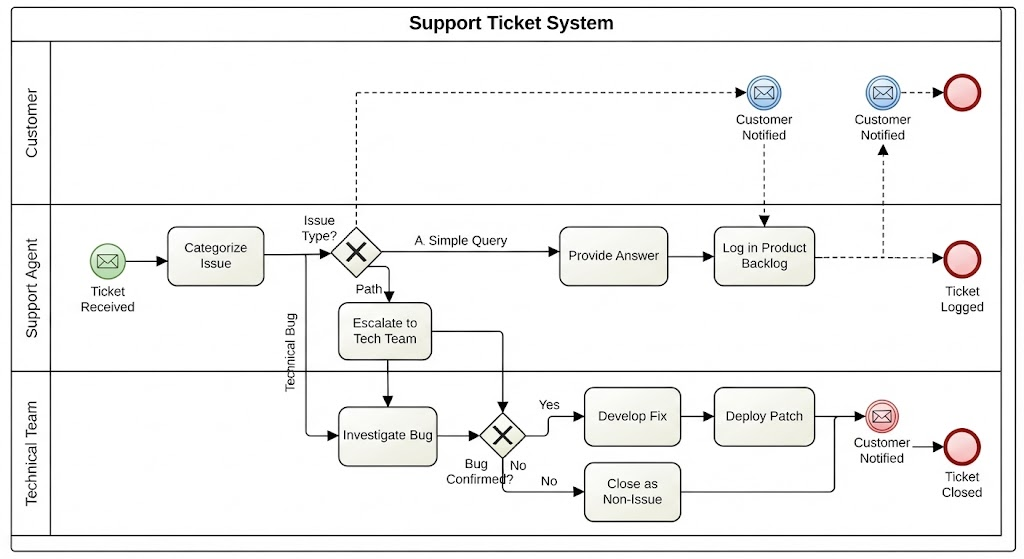
Often referred to as the External Start, this event is depicted by a circle containing an envelope icon. It signifies that the process begins only after receiving a message from an external participant.
- Trigger: Receipt of a specific message (e.g., an email, an API call, or a document).
- Usage: Perfect for scenarios like “Customer Order Received” or a system reacting to an external webhook.
3. Timer Start Event
This event allows processes to run on a schedule. It is visually marked by a circle containing a small clock icon.
- Trigger: A specific time or date (e.g., “End-of-Month Run” or “Daily Report”).
- Usage: Essential for recurring tasks such as payroll generation, scheduled backups, or automated compliance checks.
4. Signal Start Event
The Signal Start Event is used for broadcast messages. It is represented by a circle with a radio tower icon. Unlike the Message event, which targets a specific participant, a signal is broadcast to all participants listening for it.
- Trigger: A broadcast signal (e.g., a system-wide alert or a global event).
- Usage: Useful for emergency shutdowns or system-wide updates where multiple processes need to react simultaneously.
5. Conditional Start Event
This event represents a process that starts based on a data condition. It is shown as a circle with a diamond or question mark icon.
- Trigger: A specific condition becoming true (e.g., “If Order Value > $10,000”).
- Usage: Often used in conjunction with other processes to trigger specific workflows only when certain data thresholds are met.
Practical Applications & Implementation
Understanding the theory is half the battle; applying it correctly is where the value lies. Here is how these concepts translate into real-world scenarios:
- Order Fulfillment: Use a Message Start Event to trigger the workflow immediately when a “Customer Order” is received from the e-commerce platform.
- Approval Workflows: Use a None Start Event for manual processes where a manager submits a document for approval, or a Conditional Start Event if the process only starts if the document exceeds a certain budget.
- Scheduled Tasks: Use a Timer Start Event for periodic reports, such as “End-of-Month Financial Run.”
Implementation with Visual Paradigm
To effectively implement these models, tools like Visual Paradigm are essential. This software provides an intuitive interface for defining BPMN start events and their properties.
- Select the Type: Drag the appropriate start event (Message, Timer, Signal) from the palette onto your canvas.
- Define Triggers: Double-click the event to open its properties. Here, you can define the specific details, such as the “Message Name” for a message start or the “Time Cycle” (e.g., Cron expression) for a timer start.
- Connect the Flow: Connect the start event to the first activity using a Sequence Flow arrow to ensure the process logic flows correctly.
By mastering these start events, you ensure that your process models are not just static diagrams, but dynamic blueprints that accurately reflect the real-world triggers driving your business operations.